If the phrase “Dramaturgy in Educational Theatre” sounds intimidating, it may be because the word “dramaturgy” evokes visions of super-erudite scholars poring over texts, researching for months, and making tiny-but-significant changes to the plays at the Folger Shakespeare Library or American Repertory Theatre.
But my experiences of dramaturgy in educational and community theatre have led me to see that doing dramaturgical research for productions has a great return on investment. It doesn’t take months of time, either.
Actors need to understand their lines, not just memorize them. Their characters reveal themselves through their lines. For example, Tom Wingfield in The Glass Menagerie speaks poetically, with numerous allusions peppered throughout his lines. Tom openly says he wants to be a writer (Jim even nicknames him “Shakespeare”), but an examination of Tom’s speech reveals that he is already a writer. The actor playing Tom needs to be able to pronounce difficult words and know what things like “Berchtesgaden” refer to, so he can confidently portray the character.
Likewise, dramaturgy can help the rest of the production staff – directors, designers, artisans – to bring a fully-realized production to the stage.
Dramaturgical research does take time and dedication, but you can begin with creating something fairly straightforward and sequential:
A TEXT EXPLICATION.
A text explication is a document that provides explanations of difficult words, allusions, and other references in the script. It starts at the beginning of the script and continues through to the end. You can use technology to make the document interactive, and include visuals when they’re helpful.
I recommend creating a text explication, or having someone on the production staff do this, for every show you do. Having it done in advance of auditions and production work helps everyone. Artistic staff can have it as a reference during casting, and tech staff can get started on props, costumes, and set pieces a little earlier. Most importantly, you’ll have the explication ready to hand out to actors at the first read-through.
Here’s a guide to creating a text explication. Since I’m currently working on one for a production of Disney’s Freaky Friday for Everybody’s Theater Company, my example screenshots are from that document.
ONE:
READ the script. Always. EVEN IF YOU’VE DONE THE SHOW BEFORE.
Honestly, I’ve seen far too many theatre people try to “wing it” without reading (or rereading) the script when working on a production. READ THE SCRIPT PEOPLE.
TWO:
READ the script again. This time, look for words and phrases that might need explanation for production staff, cast, or crew members. I keep track of references that indicate information about props, sets, costumes, and special effects as well, but I put them in a separate document. Sometimes props, costumes, and set pieces end up in the text explication, too.
(FULL DISCLOSURE: After decades of reading scripts, it’s difficult for me to “just read” a script when I’m working on a production of it. I start mentally making notes about the requirements, and then get distracted by thinking about how that difficult prop is going to be made. So sometimes I make this step my first.)
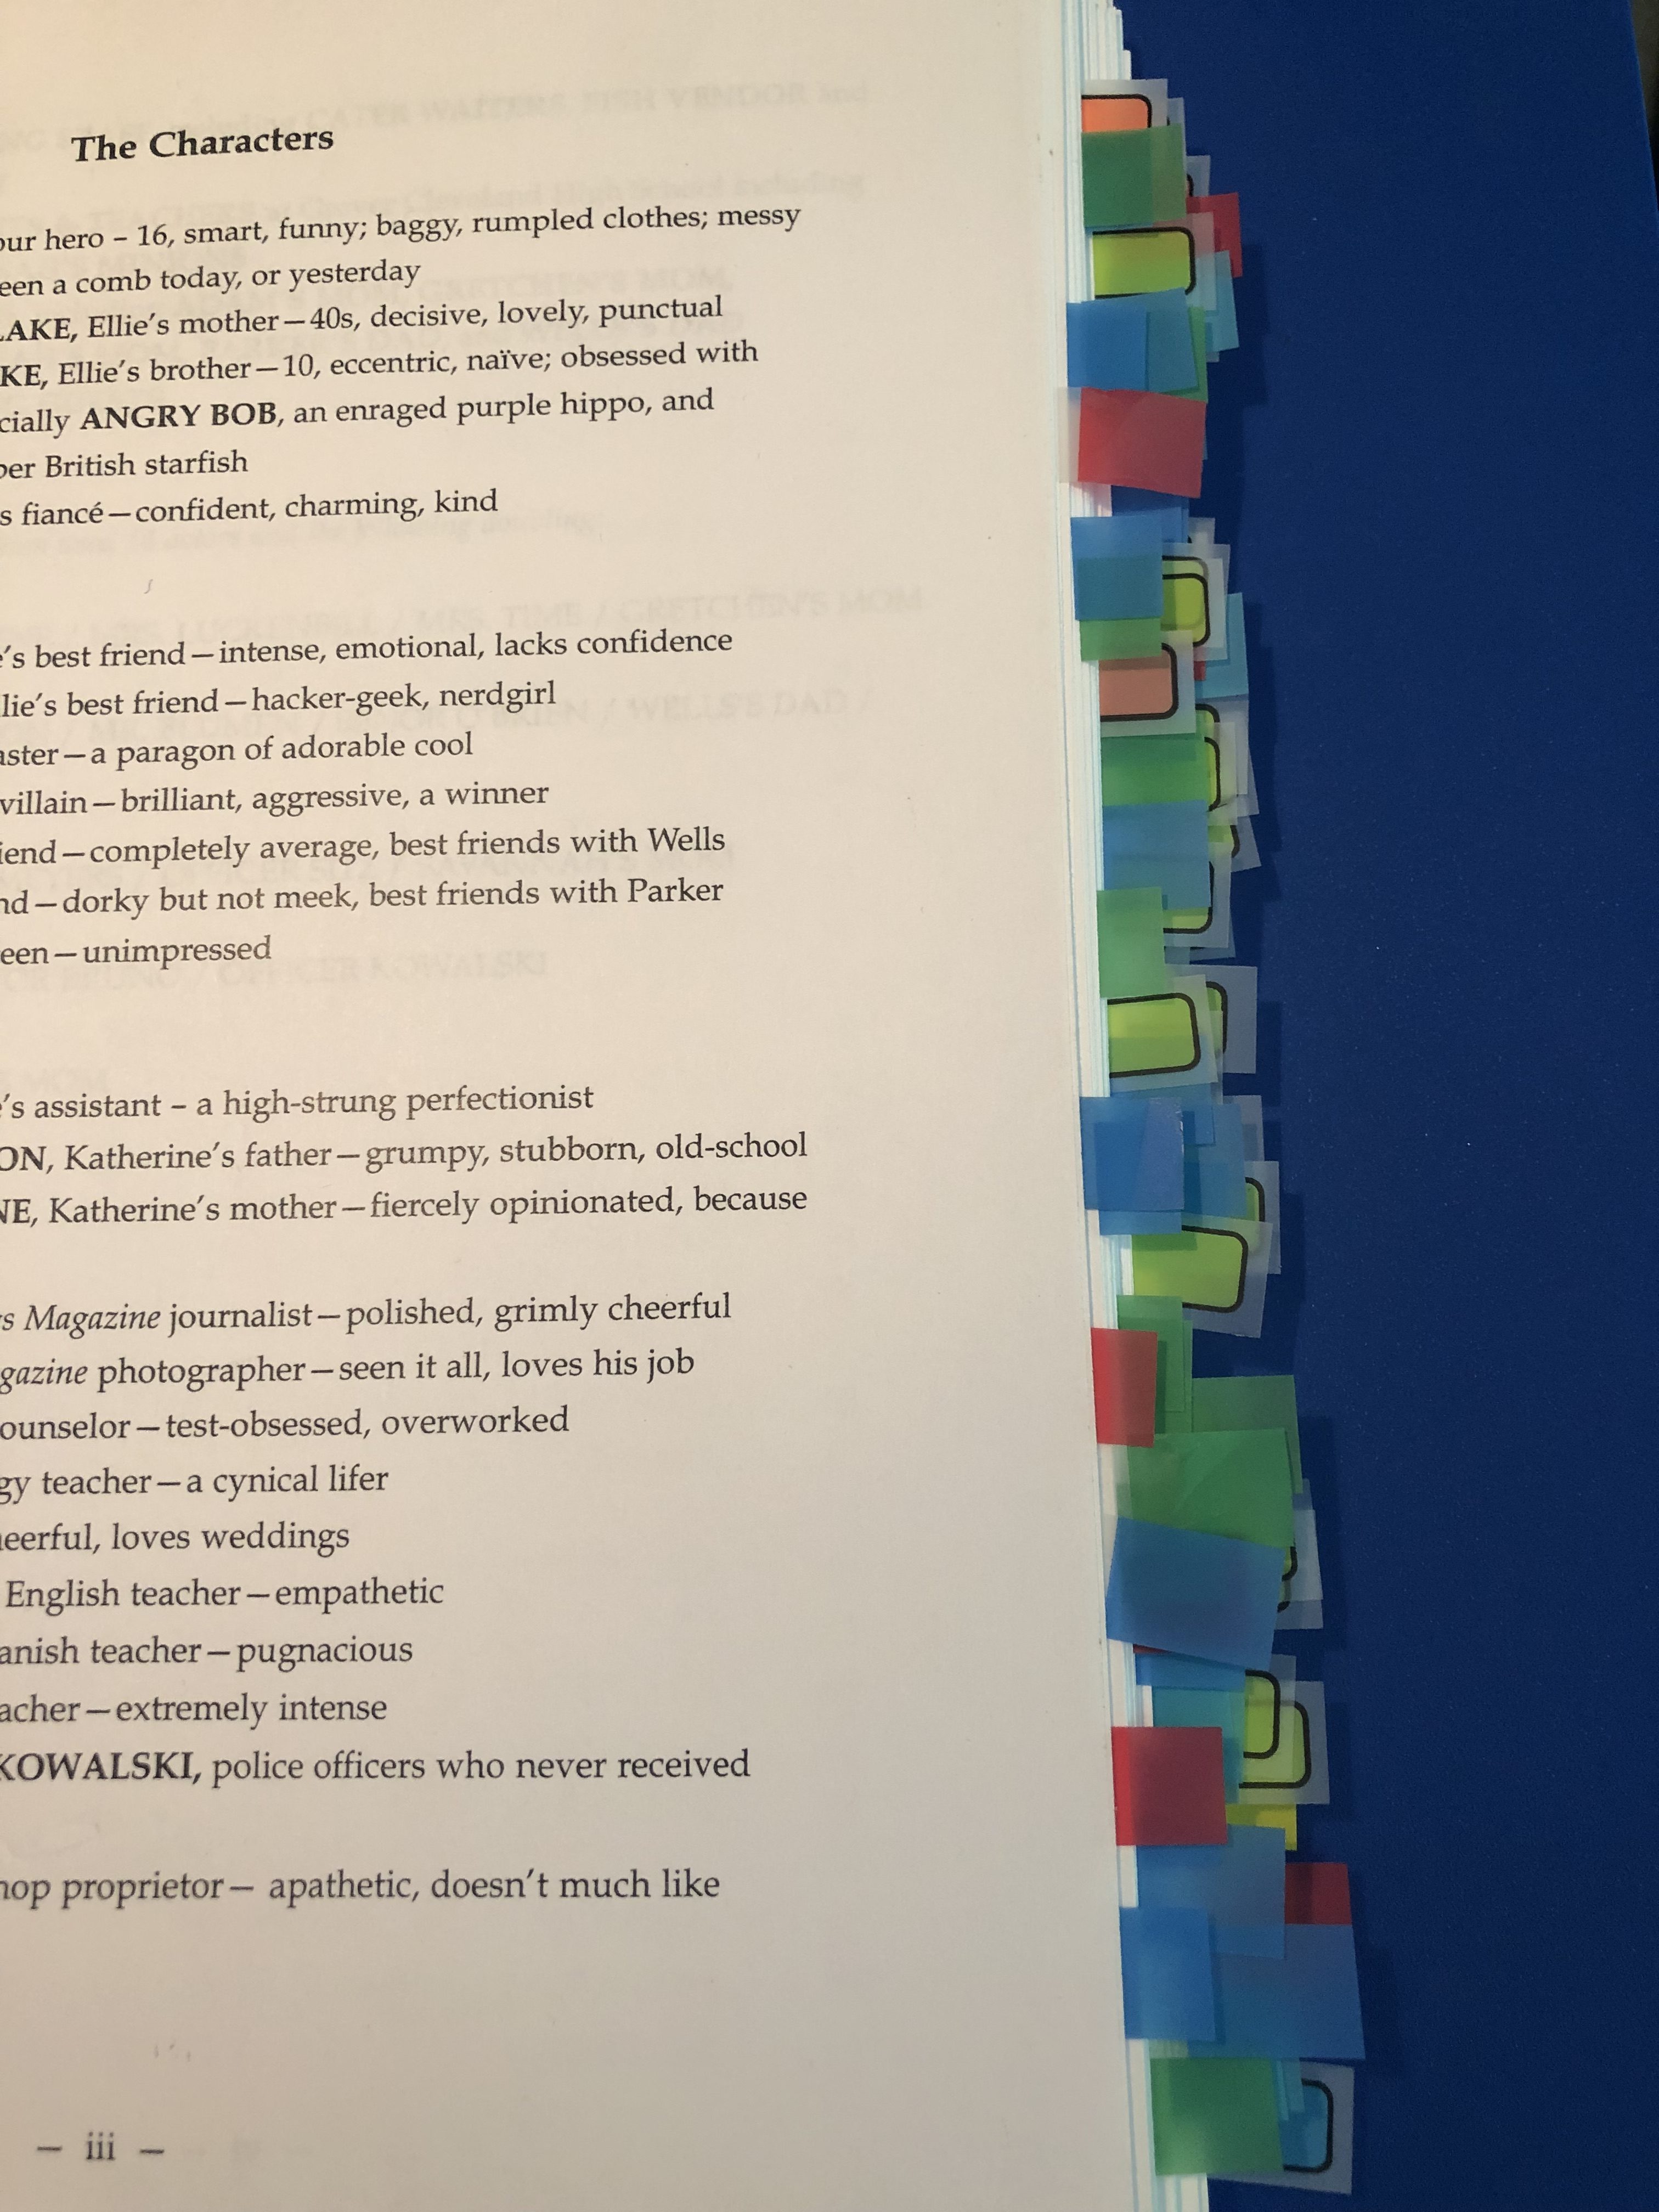
I use Post-It flags to mark all of these in the script – I can place the flag very close to the reference and still see that there’s a flag there when my script is closed. I assign a color to each category; if you’re synesthetic, you’ll know right away which color is for costumes, props, etc. (I believe this is where I’m supposed to have affiliate links to a variety of Post-It flags, right?) which makes my next step slightly easier.
This puts you in the position of trying to guess what people don’t know; and my best advice regarding that is for you to know your typical cast members/production staff. If you have an idea of how much education and life experience they have, you should be able to make good choices. Actors aren’t going to be insulted if there’s something in the text explication that they already knew; it’s there for someone who doesn’t.
HERE’S WHAT MY SCRIPT LOOKS LIKE AFTERWARDS. (If you ruffle the flags with your hand, they make a most satisfying sound! )

THREE:
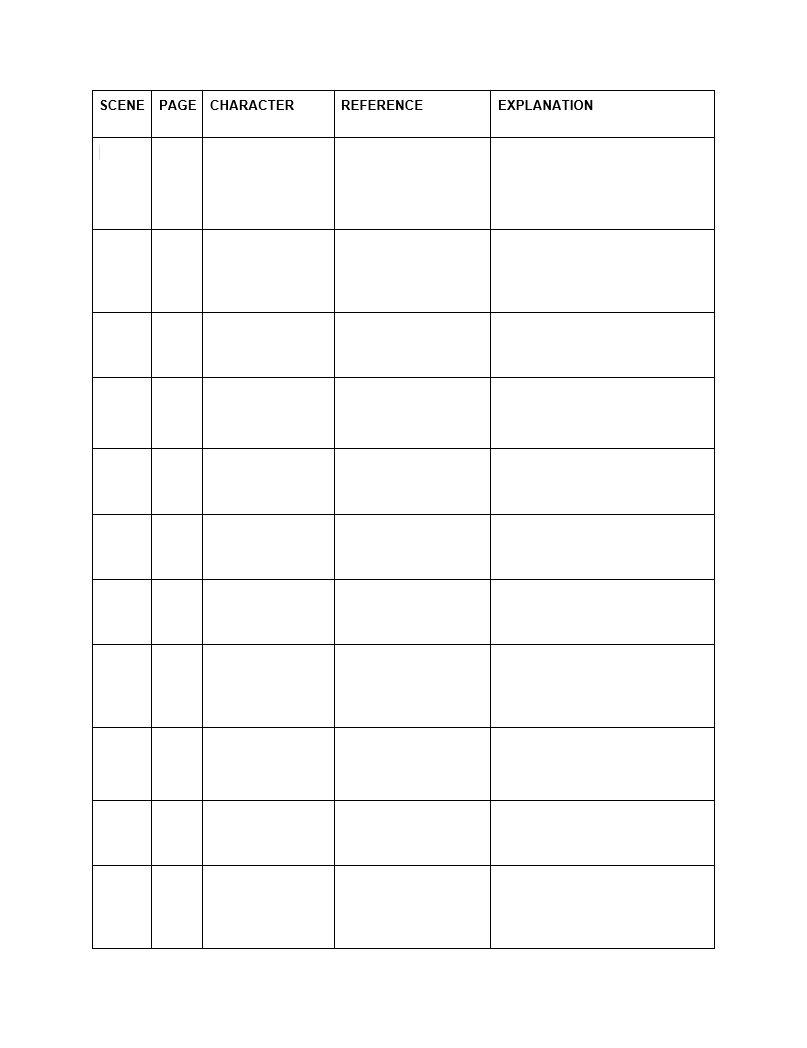
Create a chart for the text explication. You’ll need columns for SCENE, PAGE, CHARACTER, REFERENCE, and EXPLANATION.
The SCENE, PAGE, and CHARACTER columns help people to locate the text explication reference in their script and vice versa.
I use Microsoft Word for the chart initially, using the “Insert Table” function. Google Docs doesn’t allow a repeated header row in tables, so I turn the Word doc into a Google doc after I’m done. You could use a spreadsheet program like Excel or Google Sheets if you prefer.
Doing these in a word processing program allows you to link to expanded information, include pictures, and sort your rows in case things get out of order. ETC shares these documents on a Google Drive with production staff, and I can also print up well-formatted copies as needed.
HERE’S WHAT THE CHART LOOKS LIKE.

FOUR:
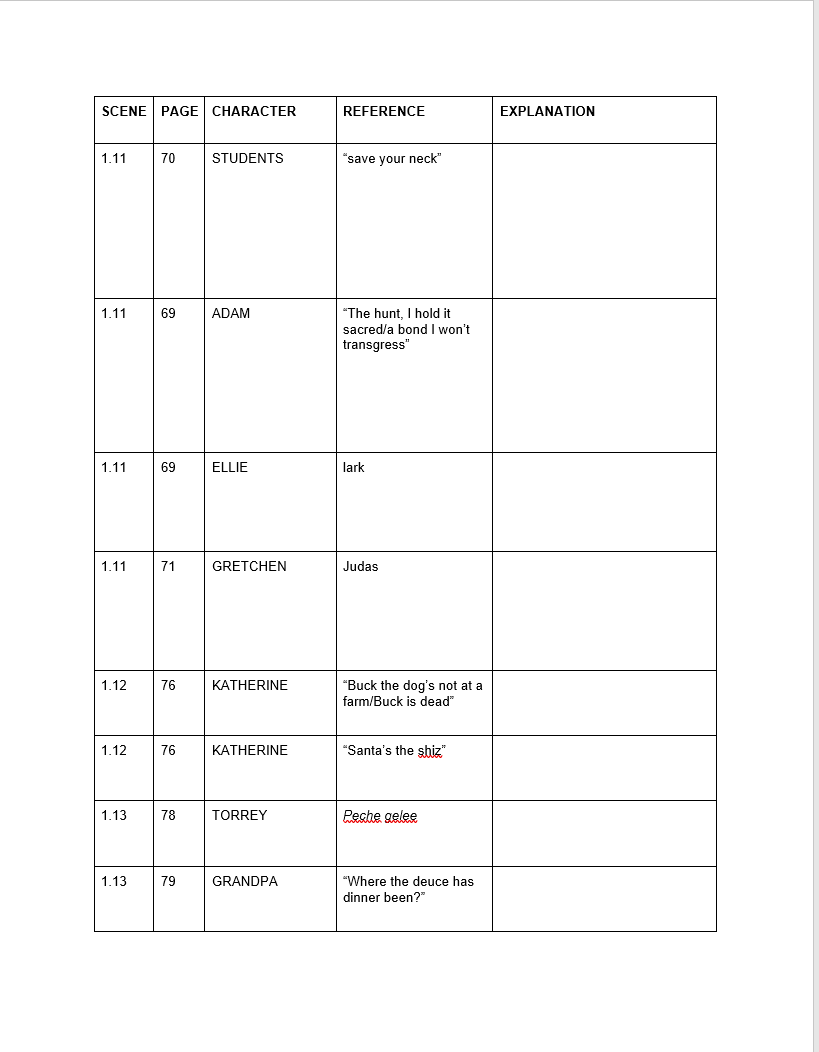
Starting at the beginning of the script, fill in the SCENE, PAGE, CHARACTER, and REFERENCE columns for each of your marked references.
You’ll probably need to make some decisions here about whether just one word, a phrase, an entire line, or several words go into a single cell. For example, in the Freaky Friday song, “Somebody Has Got to Take the Blame,” the guidance counselor, Dr. Ehrin, sings “IT COULD BE A.D.H.D., A.D.D., OR S.T.D.’s.” I put all three of the acronyms together in a single cell and wrote out what each letter stood for. I also linked to explanations of the disorders, though the cast probably won’t need to look those up.
HERE’S HOW ONE PAGE IN MY TEXT EXPLICATION LOOKS AFTER STEP FOUR:

FIVE:
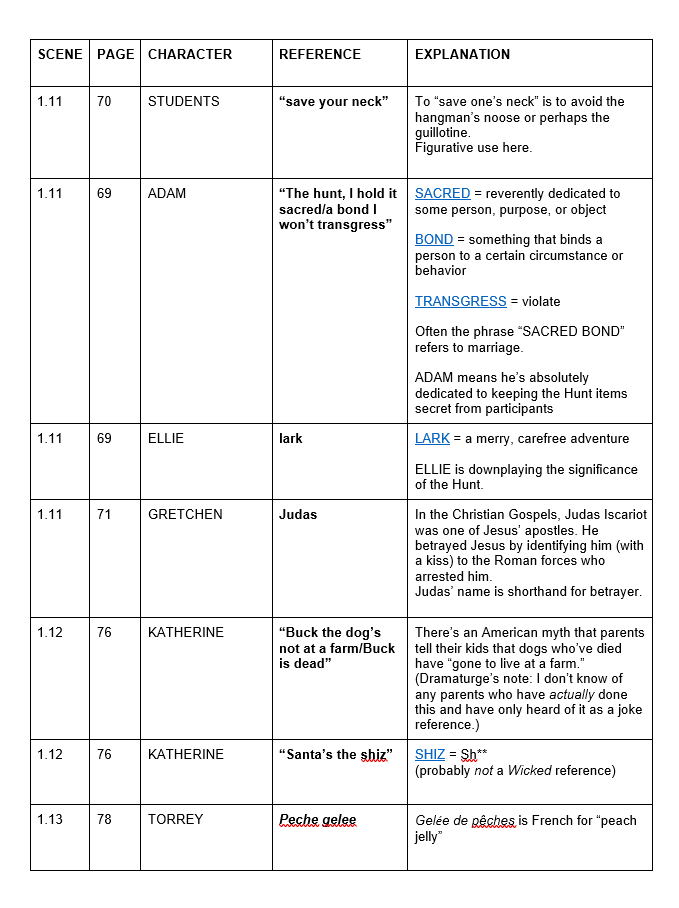
Go through your Text Explication and write a BRIEF explanation for each of the references.
These might come from your own knowledge and experience, from research, or from asking other people. Use the Internet – carefully, of course – and you’ll find most of the items that have stumped you.
You can link to further reading in case someone’s interested. I also link to the source if I’ve gotten the information directly from a website; you can see in the example below that the definitions for words have links (to Dictionary.com and UrbanDictionary.com in these cases).
Remember that you want cast and staff to be able to use this document as a quick reference during rehearsals/build sessions. Brevity is your friend!
You will likely notice “stuff you missed” as you go through the script. Add them in!
HERE’S HOW THAT SAME SAMPLE PAGE FOR MY FREAKY FRIDAY TEXT EXPLICATION LOOKS AT THE END OF THIS STEP:

And YES, during the rehearsal process, you’ll need to add things to the text explication. Often, I miss some references that stump actors because it’s a word/concept that’s in my brain and I didn’t recognize that it wasn’t in everyone else’s.
OPTIONAL STEP:
This is often helpful, especially if you prefer visual input. If there’s a filmed production of the staged play or musical available, watch it. You might choose to watch a movie version of it as well; but remember that many times the script changes from stage to screen (or vice versa). Also, remember that your show doesn’t have to look like anyone else’s version of the show.
NEXT IN THE SERIES: Research Tips & Tricks
My Post-it Flag Recommendations
- Buy the 3M Post-it brand. I’ve found other flags to be sticky on both sides, or not sticky enough. (The exception to this is the Circa brand from Levenger, but they’re pricier than Post-it.) They are more expensive, but I’ve been able to reuse 3M Post-it flags 3-4 times before they lose their adhesiveness.
- Get Post-it FLAGS, not the page markers that are 1/2 inch X 1 3/4 inches. Though they are just as sticky, the thicker paper tends to bend, wrinkle, or fold in on itself when attached to a script.
- I prefer the “On-The-Go” dispensers to the cardboard and plastic ones because then all of the colors are in the same container. I have a cute little annotation wallet I picked up years ago from Levenger (looks like it’s out of production) that I stick them in.


